
Installing a water heater may seem like a daunting task, but fear not! In this article, you will discover just how long it takes to install a water heater. Whether you are a DIY enthusiast or planning to hire a professional, understanding the time frame involved will help you make an informed decision. So, let’s dive straight into it – let’s talk about water heater installation! Installing a water heater is an important task that requires careful planning and consideration. The installation time can vary depending on several factors, including the type of water heater, the location of installation, existing infrastructure, the type of fuel used, and the necessary permits and inspections. In this article, we will explore each of these factors in detail to help you understand their impact on the installation process.
Factors Affecting the Installation Time
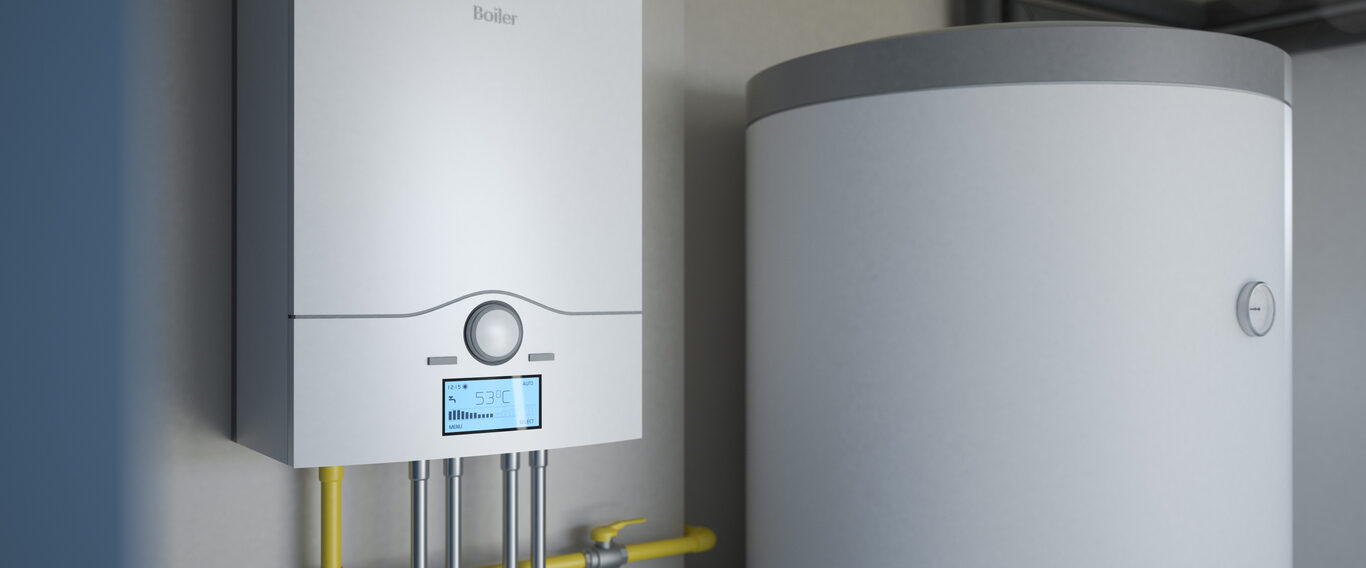
Type of Water Heater
The type of water heater you choose can significantly affect the installation time. There are various options available, such as tankless water heaters, storage tank water heaters, heat pump water heaters, and solar water heaters. Each type has its own unique installation requirements and complexities. Tankless water heaters, for example, may require additional gas or electrical lines and modifications to the plumbing system. Therefore, it is important to consider the specific requirements of your chosen water heater type when estimating the installation time.
Location
The location where the water heater is to be installed plays a crucial role in determining the installation time. If the water heater is being installed in a new construction or during a home renovation, the process may be relatively straightforward. However, if it is a replacement installation, the existing infrastructure and space available may pose challenges. In some cases, modifications to the surrounding area may be necessary, such as creating adequate ventilation or installing additional plumbing lines. These considerations should be factored into the installation timeline.
Existing Infrastructure
Existing infrastructure, such as the plumbing and electrical systems, can impact the installation time. If the plumbing and electrical connections are in good condition and meet the requirements of the new water heater, the installation process will likely be smoother and quicker. However, if there are issues with the existing infrastructure, such as outdated or incompatible components, additional time may be required to make the necessary adjustments or repairs.
Type of Fuel
The type of fuel used by the water heater can also influence the installation time. Common fuel options include natural gas, electricity, propane, and solar power. Natural gas and propane water heaters may require gas line connections, while electric water heaters need appropriate electrical wiring and circuit breakers. Solar water heaters necessitate proper positioning and installation of solar panels. Understanding the specific requirements of your chosen fuel type is essential in determining the installation timeline.
Permits and Inspections
Obtaining the required permits and scheduling inspections can add time to the installation process. Depending on your location, local building codes and regulations may dictate specific permits and inspections for water heater installations. It is important to research and comply with these requirements to ensure a safe and legal installation. Preparing all the necessary documentation and scheduling inspections in advance can help streamline the installation timeline.
Preparing for the Installation
Getting the Right Water Heater
Before you can begin the installation process, it is crucial to choose the right water heater for your needs. Consider factors such as the size of your household, hot water usage patterns, energy efficiency ratings, and available space for installation. Research different models and consult with professionals to determine the optimal water heater type and capacity for your specific requirements.
Measuring Space Requirements
Properly measuring the available space for the water heater is essential to ensure a smooth installation process. Consider both the physical dimensions of the water heater and the necessary clearance space around it. These measurements will help determine if any modifications or adjustments are needed to accommodate the new water heater. Taking accurate measurements in advance can save valuable time during the installation.
Gathering Tools and Materials
To streamline the installation process, gather all the necessary tools and materials ahead of time. Some common tools required for water heater installation include pipe wrenches, adjustable pliers, pipe cutters, Teflon tape, and a torch for soldering copper pipes. Additionally, you may need various fittings, connectors, and insulation materials. Having everything readily available will help avoid delays during the installation.
Draining the Tank
If you are replacing an existing water heater, it is important to drain the old tank before starting the installation process. This step ensures that the old unit is safely emptied and reduces the risk of leaks and water damage. Follow the manufacturer’s instructions on how to properly drain the tank, or consult a professional if you are unsure. Taking the time to drain the tank correctly will contribute to a smooth installation process.
Step-by-Step Installation Process
Disconnecting the Power and Water Supply
Before beginning the installation, it is essential to disconnect the power and water supply to the old water heater. Locate the circuit breaker or fuse that controls the water heater and switch it off. Additionally, turn off the water supply valve leading to the water heater to prevent any water flow during the installation. Safety precautions are of utmost importance throughout the installation process.
Removing the Old Water Heater
Once the power and water supply have been disconnected, it is time to remove the old water heater. Start by disconnecting any remaining plumbing connections, such as the water inlet and outlet pipes. Use the appropriate tools to disconnect the gas line or electrical wiring, depending on the type of fuel used. Carefully maneuver the old water heater out of its location, ensuring that it does not cause any damage or injuries.
Installing the New Water Heater
After removing the old water heater, position the new unit in the designated location. Ensure that it is level and stable. Connect the plumbing lines, following the manufacturer’s instructions. If you are installing a gas water heater, make sure to properly connect and secure the gas line. For electric water heaters, carefully wire the unit according to the provided instructions. Take your time to ensure all connections are secure and properly aligned.
Connecting the Water and Fuel Supply
With the new water heater securely in place, it is time to reconnect the water and fuel supply lines. Turn the water supply valve back on and allow the tank to fill up. Check for any leaks or abnormalities in the plumbing connections. If you are installing a gas water heater, turn on the gas supply and check for any gas leaks using a gas leak detection solution. For electric water heaters, turn on the power supply and ensure that all electrical connections are functioning correctly.
Testing the Water Heater
Once all connections have been made, it is important to test the water heater to ensure proper operation. Set the thermostat to the desired temperature and wait for the water to heat up. Verify that hot water is readily available and that the temperature remains consistent. Monitor the unit closely for any signs of malfunction or unusual behavior. It is crucial to address any issues at this stage to avoid long-term problems.
Insulating and Securing the Tank
To improve energy efficiency and reduce heat loss, consider insulating the water heater tank. Insulation blankets or jackets can be wrapped around the tank to help maintain the desired water temperature for longer periods. Additionally, ensure that the tank is securely fastened or stabilized to prevent any movement or damage. Proper insulation and securing of the tank contribute to its longevity and overall performance.
Common Issues and Troubleshooting
Leaking Connections
One common issue that may arise after installation is leaking connections. Leaks can occur at the plumbing connections or where the water heater connects to the water supply. Inspect all the connections and tighten them if necessary. If the leaks persist or worsen, consult a professional plumber to identify and rectify the issue. Promptly addressing any leaks will prevent water damage and potential mold growth.
Inadequate Heating
If the water heater is not providing an adequate amount of hot water, several factors may be to blame. The thermostat settings could be incorrect, the heating element or burner may be faulty, or there could be a sediment buildup in the tank. Check the thermostat settings and adjust them if needed. Inspect the heating element or burner for any malfunctions and replace them if necessary. Regularly flushing the tank to remove sediment can also improve heating efficiency.
Faulty Thermostat
A faulty thermostat can cause temperature inconsistencies or incorrect readings. If you suspect a problem with the thermostat, first check the settings and calibration. Follow the manufacturer’s instructions to recalibrate or replace the thermostat if needed. If the issue persists, it is advisable to consult a professional for further inspection and resolution.
Gas Odors
If you detect a gas odor around your gas water heater, it is important to take immediate action. Gas leaks can be extremely dangerous and require urgent attention. Turn off the gas supply, ventilate the area, and evacuate the premises. Contact your gas provider or emergency services for assistance. Gas leaks should never be taken lightly and should be addressed promptly to ensure safety.
Water Heater Noises
Unusual noises coming from the water heater can be indicative of underlying problems. Common causes of water heater noises include sediment buildup, a faulty heating element, or expansion and contraction of the tank’s metal components. Flushing the tank periodically can help remove sediment and reduce noise. If the noises persist, it is advisable to consult a professional to diagnose and resolve the issue.
Additional Considerations
Hiring a Professional
While installing a water heater can be a DIY project for experienced individuals, it is often best to hire a professional plumber or contractor. Professionals have the knowledge, skills, and tools required to ensure a safe and efficient installation. They can also address any unexpected challenges that may arise during the process, potentially saving both time and money in the long run. Additionally, professional installations may come with warranties or guarantees, providing peace of mind.
DIY or Professional Installation
If you have the necessary plumbing and electrical knowledge, as well as the appropriate tools, installing a water heater yourself can be a cost-effective option. However, it is vital to thoroughly research and understand the installation process and requirements before embarking on a DIY project. Additionally, be prepared to invest the time and effort required for a successful installation. If you are unsure about any aspect of the installation, it is always best to consult a professional to avoid potential hazards or complications.
Warranty and Maintenance
When purchasing a new water heater, consider the warranty provided by the manufacturer. Warranties can provide coverage for specific components or malfunctions within a specified period. Understanding the warranty terms and conditions is important and can help guide your decision-making process. Additionally, regular maintenance of the water heater can significantly extend its lifespan and optimize its performance. Follow the manufacturer’s guidelines for maintenance tasks such as flushing the tank, inspecting and replacing anodes, and cleaning the unit. Regular maintenance will help prevent issues and ensure the longevity of your water heater.
In conclusion, the time required to install a water heater depends on various factors, including the type of water heater, location, existing infrastructure, type of fuel, and permits and inspections. Proper preparation, understanding the step-by-step installation process, being aware of common issues and troubleshooting methods, and considering additional factors like hiring professionals or DIY installation are all essential in ensuring a successful and efficient installation. By following these guidelines and taking necessary precautions, you can enjoy the benefits of a functioning and reliable water heater in your home.